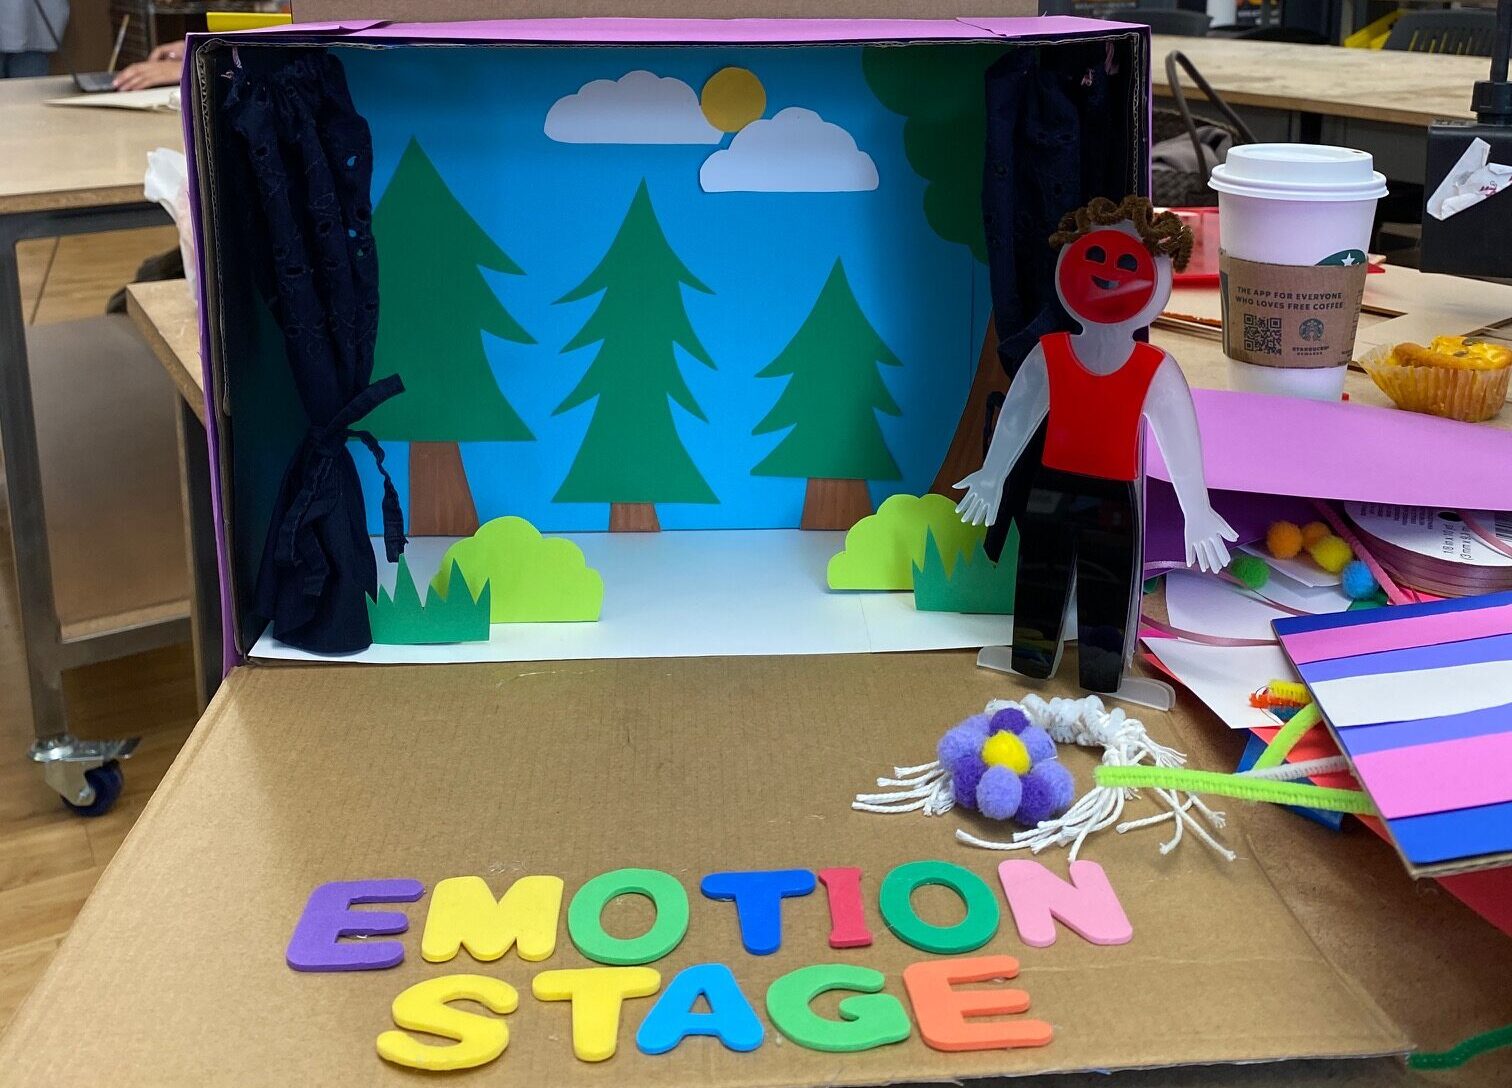
Emotions Stage
A learning manipulative for children to develop characters and discuss emotions
One of our assignments in Tangibles Electronics for Teaching and Learning class was to design a learning aid to help a learner explore the elements for building a story: e.g. character, setting, plot, etc. The tangible learning aid must consist of at least five physical objects, and learners should be able to actively manipulate and change things in order to build their understanding of the concepts.
How would we teach children the basic elements of storytelling?
For as long as mankind has lived on this earth, humans connect to each other through stories. Storytelling is an activity that we have done since we are children; and a story usually consists of three key elements: characters, setting and a plot. At the start of the project, one of the challenges that Stephanie, Zoe and I faced was to define the learning objectives that we hope our manipulative hopes to address. Namely, is the goal of our design to help children learn the elements of stories, or is it to help children understand how stories unfolded? The objectives might be similar, but can yield different outcomes.
Initial Ideas:
Our initial brainstorm session focuses on developing ideas to help teach elements of a story. This includes:
Converging the Idea

A rough sketch of the idea that I made, based on our group discussion that we’ll be taking inspirations for our manipulative from children’s flip books.
Eventually, we decided to create a tangible learning tool to help children develop characters in a story. This is due to two reasons:
Specifity
We realized that trying to get children to understand the basic concept of storytelling requires a lot of moving parts; children need to be able to understand how different characters relate to one another in order for a plot to work. But the way characters interact with one another also depends on the personality, motivations and fears of each respective characters.
Feasability
Due to time constraints, we made the conscious decision to focus on one part of storytelling, and create a tangible solution that addresses a laser cut need - instead of trying to tackle multiple things at once.
The Emotion Stage
As a learning aid, the Emotion Stage is a tool that helps children learn storytelling from developing their own characters. The goal is for learners to be able to design these characters not only from appearance but also emotions. By being able to manipulate the facial expression of the characters, the idea is that a learner can explore how a learner would react to scenarios within a story plot, both physically and emotionally.

Building the Prototype
Coming into the prototyping process, we wanted to use a combination of paper for the ‘stage’ and ‘setting’ and laser cut acrylic for anything related to the characters. Using acrylic will also give us the stability and depth that we needed as a base, as we wanted the characters to be able to stand on their own. To allow customization, our base characters and manipulated features are fitted with magnets. The idea is that magnets will allow learners to easily snap and manipulate their chosen features.
The stage was designed to feel more like a story-book setting. For the prototype, we mainly used construction paper and fabric fitted into a shoebox. We wanted learners to be able to choose and customize their background, so we created an incision as a ‘slot’ for learners to change their chosen settings. We created two sample backgrounds in this iteration, but the goal is that learners would in reality have more option or be able to create their own backgrounds.
We envision that this tool can be used in an environment where a teacher or parent is facilitating the activity. The learner can come up with a plot, either individually or with the facilitator, and design their character’s base appearance and feelings. Then, the facilitator can ask questions like: “how would your character react in scenario X?” or “how would your character feel if this happens?” or “why do you think your character felt that way?” to which learners can then respond by physically changing the characters.


Iterating the Prototype
In the process of designing our prototype, we learned that we needed to make a few changes into our original design – especially ones that revolves our laser cut acrylic characters. For example, we initially cut the facial expressions out of red acrylic.
However, the matching colors plus the positioning of the face cutouts made it difficult to see the expressions, especially at different angles. We tried to fix this by painting some of the face pieces black, but the red was still showing at some angles. For a more permanent fix, we redid some of the face pieces, cutting them out of black acrylic instead.
Future Directions
Acknowledgements:
Courses
DM-GY – 9103 Tangible Electronics for Teaching and Learning
Professor
Benedetta Piantella
Team Members
Zoe Cohen
Athia Fadhlina